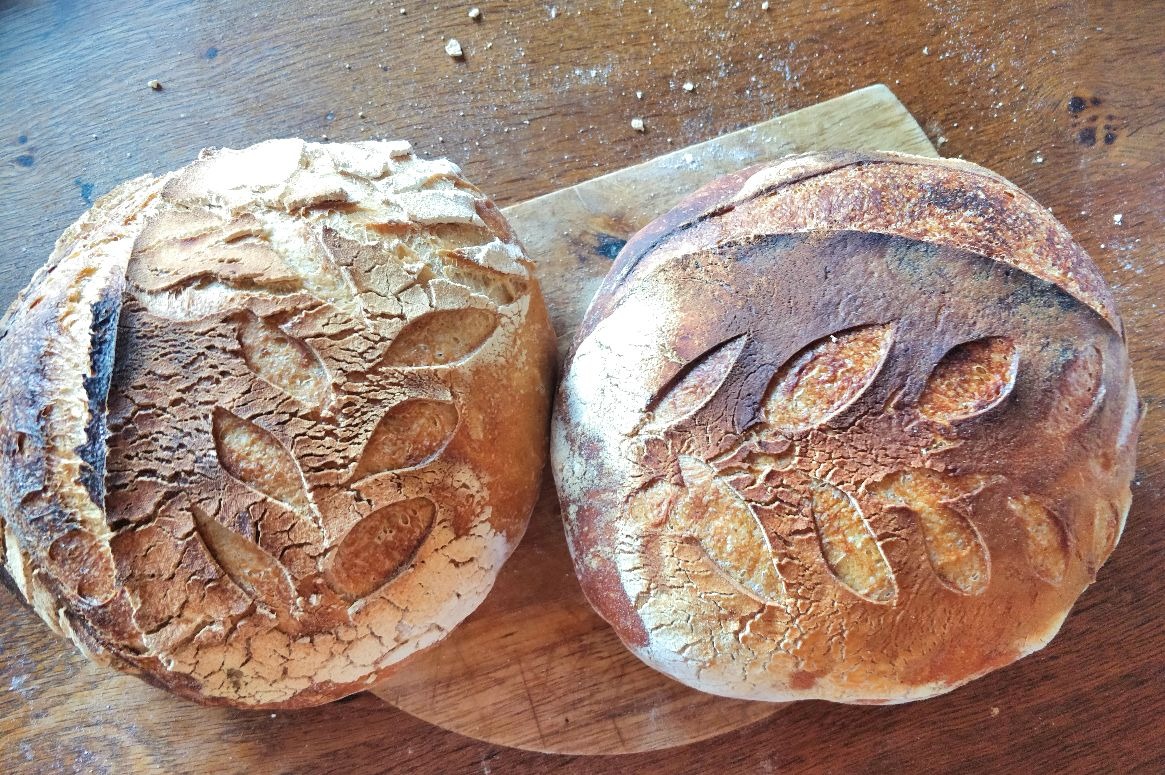
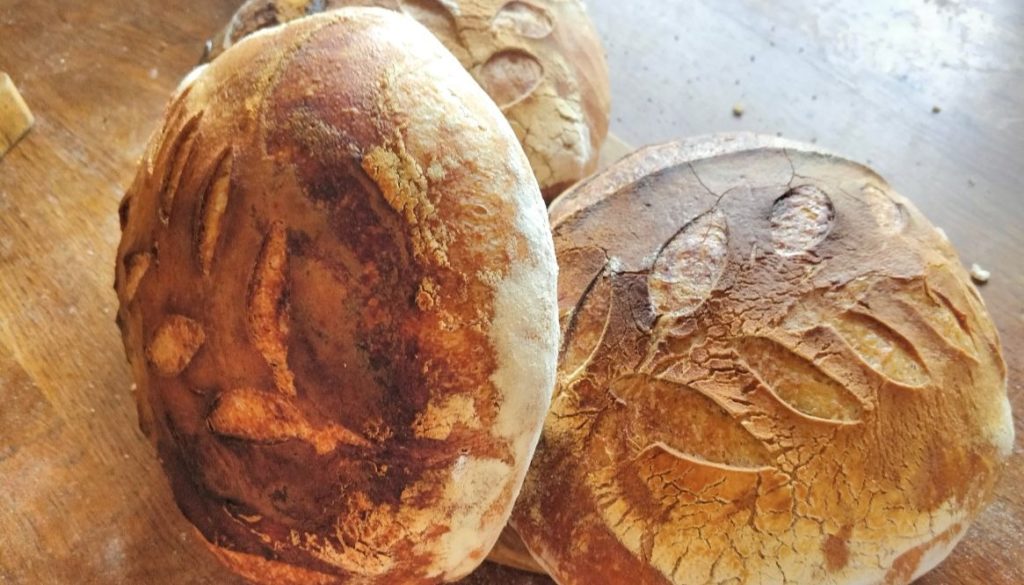
Bread (II) Sourdough wheat flour bread
In many European countries, it is common to eat wheat flour bread which is very good having a crispy crust. In this post, I’ll give you basic instructions on how to make sourdough wheat flour bread. Some thoughts before starting. 1. The sourdough starter should be “healthy” and work properly. 2. Selection of flour matters a lot. I made bread with two different flour and the result was quite different. The first bread is made of Molino Grassi Tipo 00 Speciale flour with a protein content of 13.8%. The result was Italian-style crispy bread. The second batch was prepared using the flour of the Tartu Mill Kalew type 550 (11.9% protein) flour and bread with a less crispy and soft, with a more delicate texture. The dough made with higher protein flour forms a strong gluten network and larger air bubbles. 3. Steam. Water vapor is important for the proper lifting of bread. Sprinkle water in a hot oven and pour water into a very hot water bath after placing the bread in the oven to generate steam, or use a closed-lid dish for the preparation of the bread (e.g. cast iron pot).
Preparation time: 20-30 min of dough preparation, 3h of first dough rise. 10 min shaping the pastry, second rising 3h to overnight (refrigerator method), 30-50 min baking
Level: Average
Quantity: Two loaves
Ingredients:
800 g of flour
450 ml of water
10 g of sea salt
300 g of starter
Preparation:
1. Slightly mix the flour, water, salt i and the healthy starter in the bow
2. Pour the dough mixture on a flat surface and knead. The dough is very sticky at first, but add flour only if the dough is not possible to process. Adding flour increases the density and toughness of the bread.
3. Make sure to knead the dough for at least 15 minutes, sometimes longer. Check the degree of readiness of the dough by taking a piece of dough, stretching it out and see if the thin ‘window’ of the dough is stretched off easily and the holes will appear easily. If yes, then it is not ready yet and needs more kneading. The finished dough is smooth and silky and resilient

4. Place the kneaded dough in a bowl, cover and put at the room temperature to rise for a 3 hours
5. After rising pour the dough on the work surface, knead out the air make it quadrangular form. Stretch the corners of the quadrangular piece of the dough to the center. Turn the dough piece around and repeat it. Repeat this procedure two or three times
6. Cut the dough in half to get two loaves of bread and start shaping the ball from these pieces. To do this, pull the dough along the work surface toward you. The bottom layer moves under the dough piece and volume of the dough reduces. Turn the batter 45 degrees and pull it back toward you. After three to four times, a dough ball is formed, the dough volume is reduced, and it is ready for second lifting.
7. Place the clean kitchen towel in a bowl as big as your bread will eventually come. The bread will be too flat if the wide bowl is used. You can use special dough baskets, baking molds, boxes or whatever to form the bread loaf. Sprinkle the kitchen towel generously with the flour, place the dough on the towel, cover it and let the dough rise for 3 hours in the room operation or place for 12-16 hours in the refrigerator. Wake up in the morning, warm up the oven, and bake fresh bread for the family or friends for the morning breakfast.
8. After lifting, carefully tilt the dough into a baking sheet of about 25 cm wide. Carefully remove the kitchen towel, cut the pattern with a very sharp thin knife or better with a razor-sharp in bread for a bakery symbol and decoration.
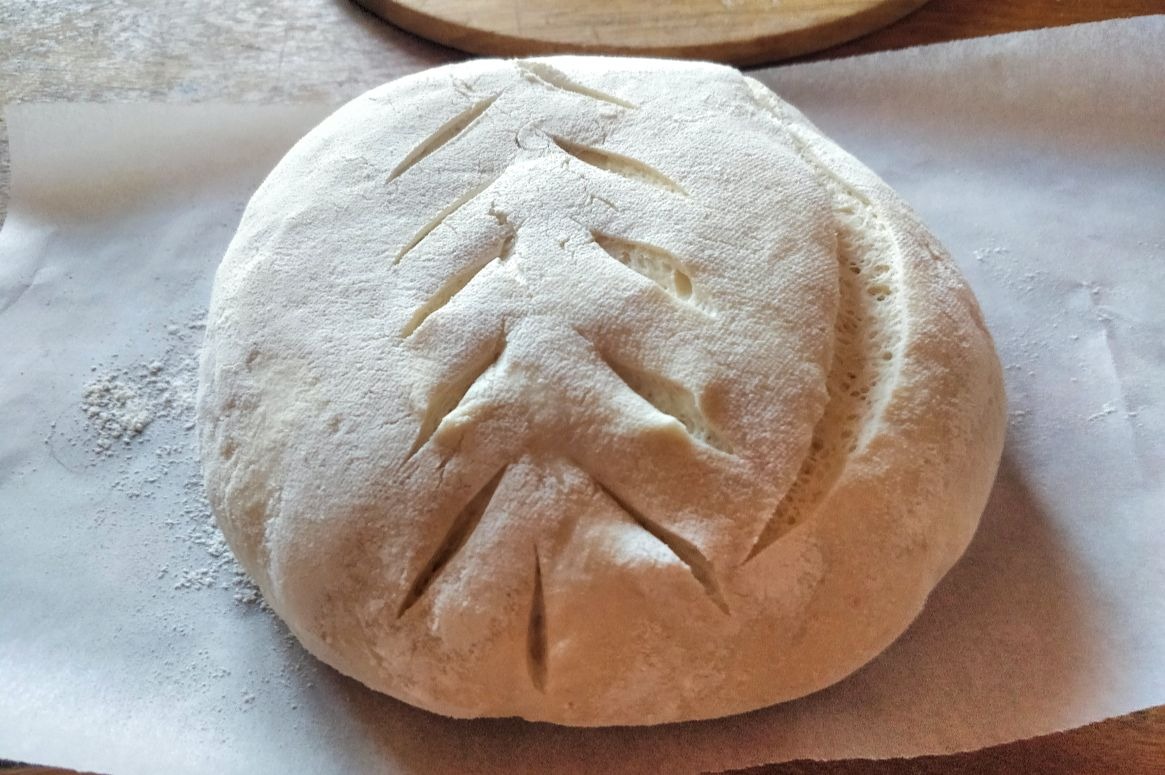
9. There are several different options for baking. Take the oven to 230-250 degrees to heat. Place to the oven water path but do not fill it. Another option is to use a cast iron oven pot. I made bread with the cast-iron pot. Lift the bread loaf from the edges of the baking paper, lifting the oven pot, sprinkle the water in the pot, close the lid and bake. Without cast-iron pot, slide the bread to the oven using thin wooden cutting board, pour hot water into a water bath to create plenty of steam, sprinkle more water in the oven and bake.
10. Bake in a pot for 25 minutes with a lid (lifting) and 25 minutes without a lid (crusting). If not using pot, cook for 30-35 minutes.
11. Leave the bread to cool for at least an hour before eating. Eat with fresh farm butter, pesto, avocado, poached eggs or whatever – orange jam
Ready !!!

